Greetings all ^-^
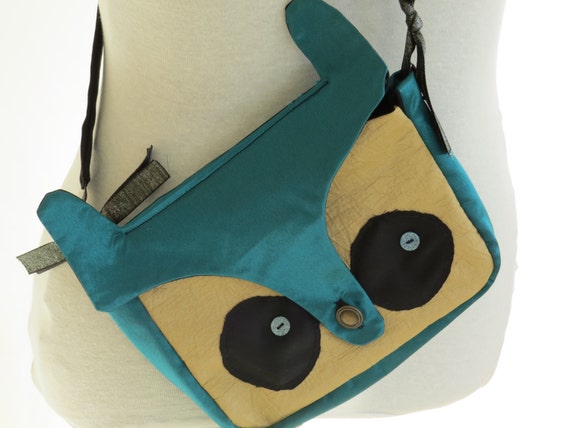
Meet Owly... the owl bag:
My sister gave me a bag like this for my last birthday, and I wore it out after a month of constant use. So, once I had the notion to do so, I made my own. Being the odd critter that I am, I felt the need to make him more colourful and ribbony than the original. Who needs real-coloured owls anyway? Right?
So, I did what any scientist would do, and backwards-engineered the bag! For science! ... and sewing?
First came the drawing around the bag on paper. Some bits didn't fit on A4, so I taped two pieces of A4 together. I'm all about the hi-tec stuff, can you tell?
The came the deciding on colours by sifting through the mess of material dubbed the "monstrous material reservoir" (it's a bag for life filled with the material that isn't in big enough pieces to make clothes out of... but giving it a fancy name makes me feel better).
Anyway, after I decided on the material of choice (green silky polycotton, gold taffeta, and standard black cotton drill for the lining), I cut out all the bits I needed. There was a lot of "yay! Finished! Wait, I'll need that too...".
Once I finally had all the pieces I sewed them all together, and added buttons for eyes and the nose. At this point I will ask you to all hail Gertrude (the sewing machine) for her automatic-one-step-buttonholes. I don't even have to hold the fabric! It's amazing!
It was then time to create a strap. The cotton drill seemed to be the best option, but it is terribly boring. Then I found my ribbon bag. The ribbon bag doesn't need a fancy name. Just by having ribbons in it, it is fancy enough.
I cut pieces of ribbon to satisfactory (read: arbitrary yet equal) length, and sewed them to both the bag and the strap. I then tied the ribbons together to create the strap you can see on Owly here:
Meet Owly... the owl bag:
 |
| Ain't he the cutest? |
My sister gave me a bag like this for my last birthday, and I wore it out after a month of constant use. So, once I had the notion to do so, I made my own. Being the odd critter that I am, I felt the need to make him more colourful and ribbony than the original. Who needs real-coloured owls anyway? Right?
So, I did what any scientist would do, and backwards-engineered the bag! For science! ... and sewing?
The came the deciding on colours by sifting through the mess of material dubbed the "monstrous material reservoir" (it's a bag for life filled with the material that isn't in big enough pieces to make clothes out of... but giving it a fancy name makes me feel better).
Anyway, after I decided on the material of choice (green silky polycotton, gold taffeta, and standard black cotton drill for the lining), I cut out all the bits I needed. There was a lot of "yay! Finished! Wait, I'll need that too...".
Once I finally had all the pieces I sewed them all together, and added buttons for eyes and the nose. At this point I will ask you to all hail Gertrude (the sewing machine) for her automatic-one-step-buttonholes. I don't even have to hold the fabric! It's amazing!
 |
| Before the buttons were added... creepy, no? |
It was then time to create a strap. The cotton drill seemed to be the best option, but it is terribly boring. Then I found my ribbon bag. The ribbon bag doesn't need a fancy name. Just by having ribbons in it, it is fancy enough.
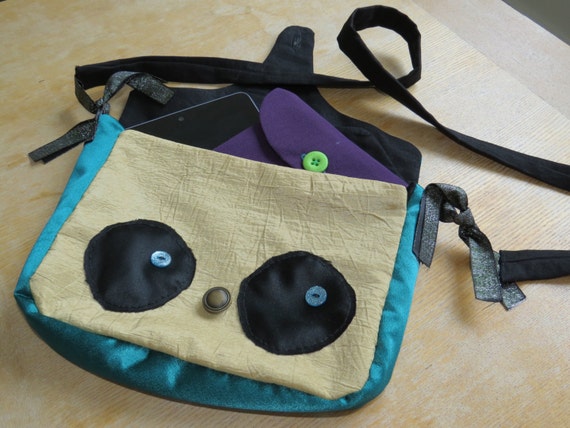
I cut pieces of ribbon to satisfactory (read: arbitrary yet equal) length, and sewed them to both the bag and the strap. I then tied the ribbons together to create the strap you can see on Owly here:
 |
| The eyes make him less creepy... the tablet helps too. |
And voilà, there you have it. One Owl bag, ready to put on Etsy. If anyone is interested in a full tutorial, let me know; it's pretty simple ^-^
Live long & prosper ^-^


No comments:
Post a Comment